
A construction project, whether it’s a cozy home nestled in the pines or a bustling new commercial hub, begins long before the first wall goes up. It starts with a vision, a piece of land, and a mountain of critical logistical steps known as site preparation. This initial phase is the foundation (pun intended) of your entire build. If done poorly, you’ll be fighting drainage issues, cracked foundations, and mechanical failures for years. Done correctly, it streamlines construction, ensures safety, and sets the stage for a seamless finish.
Navigating this complex process requires a symphony of skilled professionals, specialized heavy machinery, and precise coordination. From understanding your property lines to lifting heavy rooftop units, every decision impacts the timeline and budget. In addition to these aspects, effective communication among all stakeholders is crucial. This ensures everyone is on the same page and reduces the chance of costly delays or misunderstandings.
This guide is your Ultimate Site Prep Checklist, designed to walk you through every critical phase from the initial land survey to the crucial installation of your HVAC system. We’ll cover the roles, the equipment, and the services you need to secure a successful, high-quality build, making your construction journey smoother and more efficient.
Phase 1: Planning and Precision (The Foundation of the Foundation)

Before any earth is moved, you must understand exactly what you are working with. This phase is about legal boundaries, regulatory compliance, and understanding the physical properties of the site. It is crucial to conduct thorough site investigations, including geological surveys and environmental assessments. Properly identifying the soil type, drainage patterns, and existing infrastructure can prevent costly mistakes and delays later on. In addition, familiarizing yourself with local zoning laws and obtaining the necessary permits is essential. Engaging with architects, engineers, and legal advisors can provide valuable insights. Being meticulous at this stage helps ensure that the project proceeds smoothly and aligns with all necessary guidelines.
Step 1: Secure a Professional Land Survey
The very first checkmark on your list is engaging qualified land survey companies. A property survey is not a suggestion; it is a legal and practical requirement. These professionals will define your exact property lines, identify any existing easements (areas where utilities have access), and map the topography (the slopes, hills, and low points). This data dictates where you can legally build and informs the entire grading plan. Without an accurate survey, you risk encroaching on a neighbor’s property, building in an unstable area, or facing significant legal delays.
Step 2: Develop a Detailed Grading and Drainage Plan
Once you have the topographical map, you can create a detailed grading plan. This is where you determine how water will flow across and away from your future structure. A proper plan ensures that heavy rain or melting snow moves away from the foundation and into approved drainage systems. It prevents erosion, water pooling, and basement flooding. The details from the land survey are essential here, as they dictate the scale of the earthwork required. Additionally, considering the local climate and soil type is crucial in your design. In some areas, implementing features like swales or retention ponds may be necessary to enhance drainage and maintain site stability.
Step 3: Identify Permitting and Utility Requirements
Site preparation requires a suite of permits, which vary significantly by municipality. These may include permits for tree removal, demolition, grading, stormwater management, and sewer connections. Now is also the time to locate and coordinate utilities: water, gas, electricity, and telecommunications. Disconnecting, moving, or installing these services must be scheduled meticulously to avoid stopping work later. Additionally, it’s crucial to consider any environmental assessments that may be required, as many areas have regulations protecting local wildlife and habitats. Engaging with local stakeholders and obtaining community feedback can also help in addressing concerns and ensuring a smoother preparation process, ultimately contributing to a successful project launch.
Phase 2: Breaking Ground (Moving Earth and Clearing the Way)
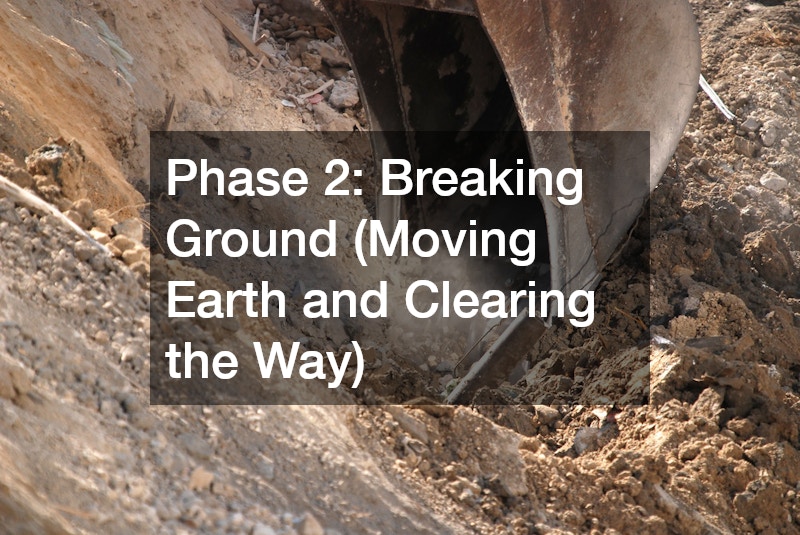
With plans approved and permits secured, it’s time to move earth. This is the most visible part of site preparation and is dominated by heavy machinery. Large excavators, bulldozers, and dump trucks work in synchrony, reshaping the landscape. Operators carefully navigate the equipment to ensure precision, creating a solid foundation for the forthcoming construction. Dust clouds billow as the earth shifts, signaling the start of a new phase in the project. Each movement is deliberate, setting the stage for what’s to come.
Step 4: Site Clearing and Demolition
If your lot is a “greenfield” site, this step involves “grubbing”—removing trees, brush, stumps, and rocks. For “brownfield” or infill sites, this might mean demolishing existing structures and removing debris. Clearing creates a safe, blank canvas for construction. It must be executed precisely to protect any trees or areas marked to remain on your survey. Proper planning ensures that the clearing process respects local regulations and environmental guidelines. Additionally, erosion control measures should be put in place to prevent soil runoff during and after the clearing process. It’s also an opportunity to assess the topography, identify utility lines, and prepare for future construction phases. Engaging professionals for this task can help minimize risks and streamline the transition from a cleared lot to an active construction site.
Step 5: Mobilize Your Primary Earthmover: The Excavating Contractor
The most critical player in this phase is your excavating contractor. This team moves the bulk material. They are responsible for:
- Digging foundations: Creating the precise depth and shape for your footings and basement.
- Creating trenches: For all underground utilities (sewer, water, electric).
- Rough grading: Pushing vast amounts of soil to establish the general elevations required by your grading plan.
A good excavating contractor is an artist with a 30-ton machine, leaving precise edges and managing soil stockpiles efficiently.
Step 6: Specialized Work with Local Yard Grading Contractors
While the excavators move the bulk of the soil, the final contours and precision slopes often fall to local yard grading contractors. Think of them as the fine-finishers of the ground. They take over after the rough grading is complete to ensure:
- Perfect slopes away from the foundation for water management.
- The ground is level and compacted where patios, driveways, or walkways will be installed.
- The final seedbed for landscaping is properly prepared.
Coordinating the work of the large excavators and the detail graders is vital for a seamless transition to the actual build.
Step 7: On-Site Logistics and Equipment Rental
Managing a modern construction site requires a dynamic flow of materials and people. You can’t have every piece of equipment on site from day one. This is where strategic equipment rental becomes your best friend. Instead of tying up capital purchasing a bulldozer or a large skid-steer loader that you’ll only use for a month, you rent it for the exact window it’s required.
But heavy machinery breaks. A blown hydraulic hose on an excavator can stop the entire site. To prevent crippling downtime, ensure your contracts include access to on site hydraulic services. Mobile on site hydraulic services can diagnose a leak or failure and fabricate new hoses immediately, turning a full-day stoppage into a one-hour pause.
Step 8: Material Handling with Forklift Rental
As materials arrive—lumber, rebar, pipes, masonry—you need to move them efficiently from delivery trucks to their designated staging or installation areas. A crucial component of this logistics chain is a dependable forklift rental. Standard industrial forklifts are perfect for paved areas, but for a raw site, you will likely need a rough-terrain forklift (or “telehandler”) with large tires and an extended reach to move heavy pallets across uneven ground.
When selecting a forklift, consider the specific requirements of your site, such as the weight of the materials being handled and the conditions of the terrain. Adequate operator training is also essential to ensure safety and efficiency during operation. Regular maintenance and inspections of the equipment ensure that it remains in good working condition, minimizing downtime and enhancing productivity. Additionally, effective communication with delivery drivers about staging areas can help streamline the material unloading process and keep the project on track. By planning carefully, you can significantly improve your overall site logistics and workflow.
Phase 3: Going Vertical and Reaching the Finish Line
Site prep blends smoothly into construction, but there are final critical lifts and precision installations that depend heavily on the coordination established earlier. Effective communication among contractors, architects, and engineers is vital during this phase to ensure that every component fits together seamlessly. Attention to detail is paramount to avoid costly delays and ensure project success. Proper planning and foresight during site prep significantly reduce the risk of errors later on, paving the way for a streamlined construction process.
Step 9: Managing Heavy Lifts with Crane Rental
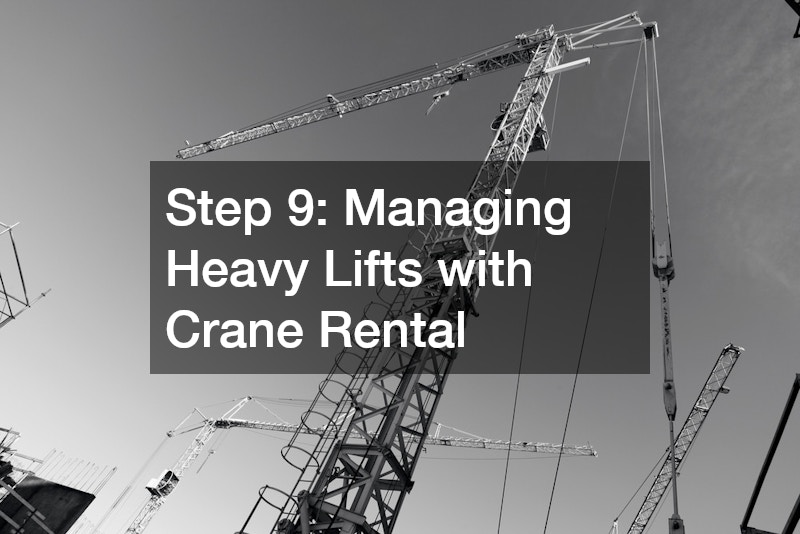
As the building takes shape, you will invariably face lifts that are too heavy or too awkward for a forklift. Installing large steel structural beams, placing modular building sections, or—critical for this checklist—lifting multi-ton industrial HVAC units onto a commercial roof. For these specialized tasks, you must coordinate a reliable crane rental. The type of crane you select (mobile, crawler, tower) depends on the lift radius, weight, and site accessibility, all of which are defined by your site plan and the initial land survey’s contours. Additionally, consider any potential obstacles like nearby structures, power lines, or unstable ground that may affect crane operation. Planning is key; proper timing and coordination with your rental provider will ensure that everything runs smoothly. Ensure that all personnel involved are well-informed about safety protocols and that the crane operator is certified. This way, you can minimize risks and delays, ultimately leading to a more efficient construction process.
Step 10: Relying on a Skilled Crane Operator
When you rent a crane, you are not just renting a machine; you are renting the expertise of its operator. The crane operator is one of the most highly trained professionals on any construction site. They must account for complex rigging, weight distribution, wind speed, and potential “blind” lifts, where the load is hidden from their direct view. Their skill is essential not only for placing heavy components precisely but, more importantly, for ensuring the safety of everyone on site. Their workspace, outriggers, and lift plan must be flawlessly coordinated with all other trades.
Step 11: Final Precision with Your Local HVAC Contractor
The last step in this site prep checklist is the definitive transition from a structure to a functional building: installing the environmental systems. This is where your local HVAC contractor takes center stage.
They are responsible for designing and installing the complex system of ductwork, air handling units, furnaces, and condensers that make the space livable. Their coordination with the overall timeline is vital. In a residential build, the rough-in (installing ducts) must be scheduled after the structure is dry but before the drywall goes up. In a commercial project, they must work with the crane team to place powerful rooftop package units.
Your local HVAC contractor’s performance depends on the site prep that came before: they need a perfectly level pad (courtesy of the yard graders) for ground-mounted condensers, and a stable area (surveyed and prepared by excavators) for any cranes required to install the main system.
Integration: The Core of Project Success

The most significant takeaway from this comprehensive site prep checklist is integration. No trade is an island. A perfect land survey is useless if the excavating contractor digs the foundation a foot off. The local yard grading contractors can create the most elegant slopes, but if the main grading plan fails, the local HVAC contractor will be fighting moisture problems in the ductwork. A crucial crane rental can be stopped dead by an unreliable forklift rental failing to move materials out of the way, or a piece of heavy equipment breaking down without on site hydraulic services on call.
Your job as a project manager is to orchestrate these various specialists into a cohesive team, ensuring that one successful checkmark directly enables the next. Follow this sequence, coordinate with quality professionals, and your vision will become a robust, dry, and comfortable reality.